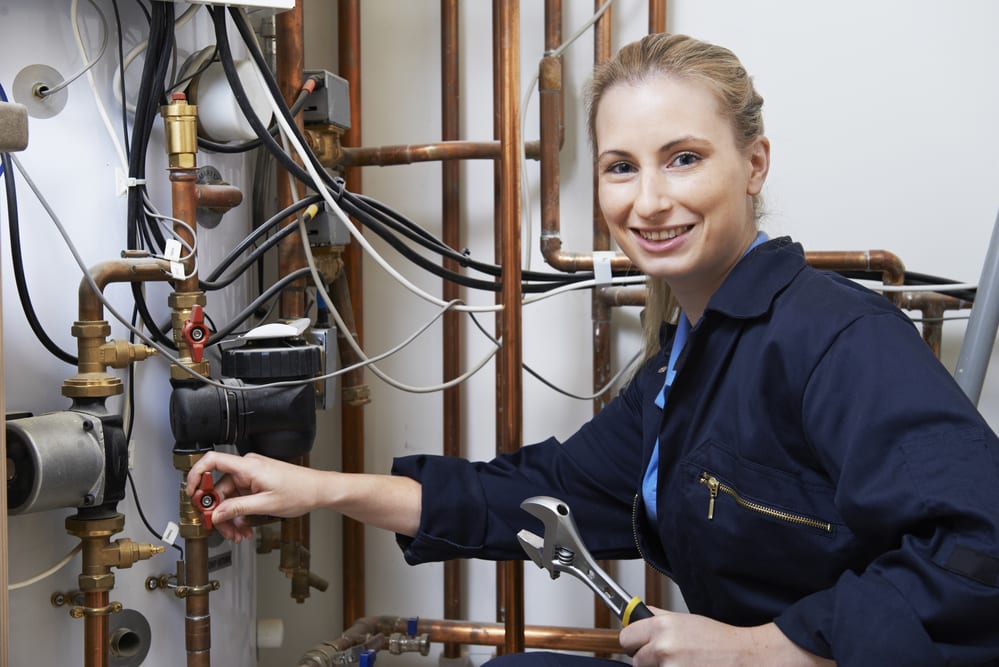
Hot Water Heater Replacement – What You Need to Know

Water Heater

If the rust is extensive, the tank is overdue for replacement. Leaks from the tank can cause severe water damage. For professional help, contact Hot Water Heater Replacement Denver now!Water Heater
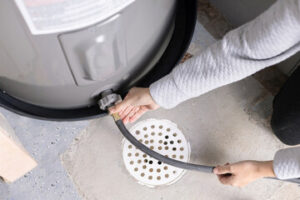
To remove the old unit, turn off your water supply (at the main or isolation valve on the incoming cold water line) and drain the tank using a garden hose. Disconnect the water lines using a pipe wrench or channel-lock pliers (for compression or union fittings).

A water heater’s anode rod is an unsung hero, protecting the tank from corrosion by attracting and eating away at the more corrosive minerals found in your home’s water. It’s important to inspect your anode rod regularly and replace it when necessary.

The longevity of an anode rod depends on your home’s water quality, usage, and the material used to construct it. Generally speaking, however, an anode rod should be replaced every three to five years. A physical inspection will reveal if the rod has suffered severe wear; it should not be heavily corroded or significantly thinner than it originally was. A thinning rod is also an indicator that it’s time to switch to a new one, as it will no longer be effective in protecting the tank lining.

Anode rods are typically made from magnesium or aluminum, or a zinc-aluminum alloy. The type of anode rod you choose will depend on your water’s hardness and pH level. Magnesium rods suit most conditions, while aluminum is suitable for soft or low pH water.

Replacing the anode rod is a simple task that can be performed by a homeowner, though it requires a water heater to be drained and may require tools such as a breaker bar. If you are not comfortable performing this task on your own, it is advisable to seek the assistance of a professional plumber or HVAC technician. A professional will have the tools, knowledge, and experience to perform this job quickly and safely. In addition, the plumber will likely drain and flush your water heater as well, a process that can further extend the life of your anode rod. This can also help reduce the frequency of future anode rod replacements.

Dip Tube

If you’ve lost access to hot water and found a residue of small plastic bits around faucets and showerheads, the problem may lie with your dip tube. This short piece of pipe carries cold water into your hot water heater to push it down towards the bottom to be heated. Then it churns the hot and cold water to keep a steady supply flowing through your plumbing. But just like anode rods, dip tubes wear out and need to be replaced. Fortunately, it’s an easy and inexpensive fix.

Corrosion is one of the main culprits in shortening the lifespan of your dip tube. It happens because minerals in hard water attack the plastic and break it down over time. It’s also worn out by repeated exposure to very hot water. Another reason your dip tube might wear out is if it’s cracked or damaged. This can allow cold water to escape the tube and mingle with the hot, causing your water temperature to drop.

Replacing your water heater’s dip tube is fairly simple. First, you’ll want to turn off the power to your hot water heater. This is important because you could get an electric shock if you don’t. Next, drain your tank to remove any plastic flecks that have formed. Now you can disconnect the cold water pipe and the pipe nipple at the top of your tank, and then remove the dip tube by turning it counterclockwise with a screwdriver.

Now that your old dip tube is removed, simply install a new one. Make sure to use a tube made from a durable material, like cross-linked polyethylene PEX, and that it extends down all the way to the bottom of your tank. After you’ve installed the new tube, connect it to the cold water inlet and reconnect the cold water supply line, and then restore power to your tank and turn on the gas.

Thermostat

A thermostat is an essential part of your water heater that ensures your home is always receiving the right temperature. It’s not uncommon for homeowners to experience problems with their thermostat, but there are a few things you can try before replacing the unit entirely. To begin, make sure the breaker hasn’t been tripped. If it has, switch it off and on again. If the problem persists, you’ll need to replace your thermostat.

To do so, you’ll need to have a few tools and materials available. Essentials include screwdrivers, a multimeter and a replacement thermostat. Once you’ve gathered these items, shut off the power to your water heater by turning off the circuit breaker. Then, remove the screws from the access panel and take off the plastic safety cover to expose the upper and lower heating elements and thermostat. Make sure to label the wires connected to each before removing them so you can reconnect them properly later on. Next, use a multimeter to check if there’s any power on the upper element terminal screws.

If the meter reads no voltage, your thermostat is likely defective. However, if the reading is fine and the heater seems to be working fine, the problem may lie elsewhere. It’s also possible that your breaker has tripped, in which case you’ll need to reset it.

When buying a new thermostat, be sure to select the same model and style as your old one. Having the same type and model will help ensure that your new one is properly installed and is compatible with your heater. Once you’ve finished replacing the thermostat, screw it evenly down into its holding bracket and reinstall the access panel and safety cover.

Element

The heating element is the most important component of a water heater, as it’s responsible for heating and distributing hot water throughout the home. It’s also the longest-lasting part of a water heater, lasting about 10 to 15 years on average. However, as with any electric device, the elements aren’t designed to last forever, and it’s not uncommon for them to malfunction or fail due to a variety of reasons.

Luckily, it’s fairly easy to identify the sign of a faulty heating element. Common symptoms include a lack of hot water or a constant tripping circuit breaker, both of which can be caused by a failing element pulling too much electricity. A visual inspection can be helpful, as well; signs of corrosion and damage on the element are often clear indicators that it’s time to replace it.

Before you begin the repair process, it’s imperative to shut off the power to your water heater. You’ll also want to drain the tank partially or completely (depending on the position of the heating element) by connecting a garden hose to the drain valve located at the bottom of the water heater and running it until it’s empty. This step will prevent any water from splashing onto or damaging the new element as you’re removing and replacing it.

Once the water heater is drained, you’ll be able to remove the element by disconnecting the electrical wires from it. If the element is a screw-in type, you’ll need to unscrew it using a ratchet wrench or a socket that fits the size of the heating element. After the old element is removed, install your new one by threading it into the hole and tightening it with a socket wrench or ratchet.

Pressure Valve

The pressure valve (T&P) is a critical component of hot water heaters, as it alleviates excess pressure from within the tank, protecting your home from potential tank bursts and leaking. In fact, the T&P valve is an important safety feature that should be tested every year to ensure it’s working properly.

When the inlet pressure rises above the set pressure of the valve, the compression of the spring overcomes this force and the valve opens, diverting the flow through a port or directly to atmosphere, depending on the configuration. The valve will close when the inlet pressure returns to its set point.

It’s important to select the right valve for your application, as the piping, temperature and pressure range will determine which type of valve is appropriate. Consult with an expert or manufacturer if you’re unsure what type of valve is best for your project.

Before installing a pressure relief valve, make sure the discharge pipe is connected to a drain and that the valve is not installed over a hot water or steam line. The valve should also be positioned with its body at least 2 inches above the ground to avoid contamination and to facilitate serviceability.

Once the pressure valve is in place, turn off the water supply to your home at the main shutoff valve or at the isolation valve on the incoming cold water line. Then disconnect and remove the old water heater from its location, ensuring all connections are clean and dry. Position the new water heater and connect its temperature and pressure relief valve, discharge drainpipe, gas line, and electric terminals according to the manufacturer’s directions. Once the valves are in place, test by brushing soapy water over all plumbing joints and connecting points.
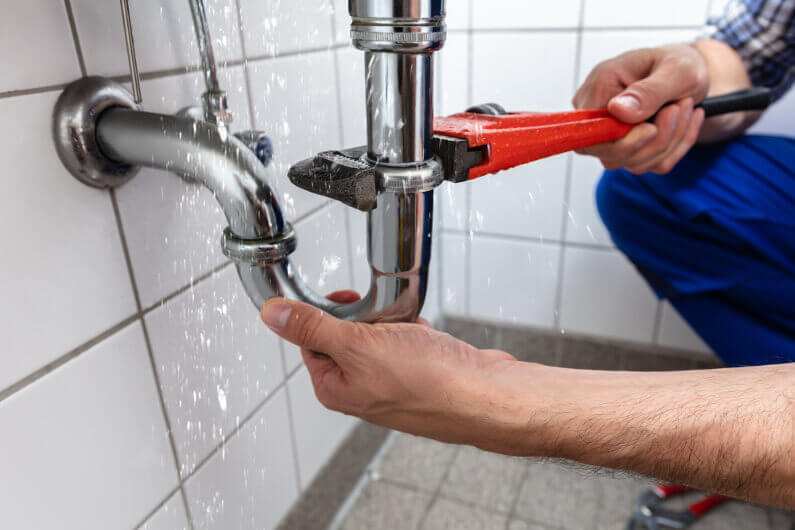
The Basics of Plumbing

If you’ve done the plastic sheet test and found moisture in your basement, it’s time to consider installing a sump pump. Most pumps sit in a pit on the basement floor and are powered by a backup battery that springs to life when the primary pump fails during a flood. A plumbing pipe attached to the pump’s outlet directs water outside – into a storm drain or a sewer system if allowed by local regulations. For professional help, contact Plumber Chatsworth.

A float switch allows your pump to turn on when the water level rises in the tank. Depending on your needs, You can set them up to shut off when the water level drops. Float switches are very reliable and inexpensive compared to pressure sensors. They’re used in various applications, from sump and sewage pits to industrial washers and refrigerators. They also suit most liquids, including potable water and highly corrosive chemicals.

Plumbing Basics: This Is How Your Home Plumbing System Works

There are several different types of float switches, each with its own advantages and disadvantages. To choose the right one for your needs, consider: – The size and depth of your tank – make sure the buoyant float has an adequate stem length or cable to reach your desired water level. – The switching action you want – do you need a normally open switch that activates when the water level rises, or a normally closed switch that activates when the water levels fall?

– The material the float switch is made from – confirm it’s compatible with the liquid in your application. You should also ensure that the operating voltage and current of the float switch is compatible with your control circuit.

The heart of a float switch is a buoyant, spherical piece of plastic or another material that’s designed to float on the surface of your drain pan. It fits around a vertical rod, typically connected to the switch mechanism, which contains electrical contacts that open or close when the float rises or falls. The switch mechanism is usually encased in plastic or stainless steel to protect it from water and debris.

The float’s motion causes the magnet in the reed switch to move up and down along the stem. As the float rises or falls, the position of the magnet affects the contact points inside the switch, allowing the contacts to open and close when the float reaches your desired water level. This signal can be passed through to a switch that will activate a device, such as a pump, or even a water alarm.

Discharge Pipe

The discharge pipe takes water from the sump pump and directs it away from your home. It can be buried in the ground or run to a drain in the yard, but it must always extend far enough from your home so that backflows don’t occur and flood the basement again. It must also be installed properly to avoid clogs and freezing.

The pipe must be at least two feet below the frost line in your area to prevent the water in it from freezing and clogging the drainage system. It should have a long-radius elbow where it turns, and the inside of the pipeline should be smooth to prevent any buildup of combustible oily carbon deposits. This piping must be made from materials tested, rated and approved for this use.

A buried pipe can easily be blocked by a lawn mower, which could cause it to stop draining or even burst. To prevent this from happening, contractors should install the pipe in a spot where it can be reached without digging, and they should check it every time they mow the lawn to make sure it is not blocked.

Another issue with a buried discharge line is that it can get clogged by mud or debris if it isn’t properly maintained. This can be prevented by checking the end of the pipe frequently for obstructions and regularly cleaning it with a garden hose. It is also important to keep it free of twigs, branches and other debris to ensure that water can flow freely through it.

The discharge pipe should be sized to handle the maximum volume of water expected, and it should be a minimum of twice as wide as the rest of the drainage system. It is also recommended that the pipe be a flexible PVC pipe to reduce the risk of freezing and clogs. A patented system like our IceGuard can be added to the discharge line, which provides an escape path for water in case of blockage due to freezing or a clog. This allows the sump pump to continue functioning if the buried line freezes or becomes blocked, and the water can escape through the ice-free exit point until it thaws.

Installation

The plumbing industry comprises a network of pipes, fixtures, and fittings that transport fluids, mostly water, throughout buildings and structures. Its scope includes installation, maintenance, and repair of these systems. It also encompasses the design and layout of plumbing networks. Plumbing work is regulated by local and national building codes. Plumbers are often required to be licensed by the relevant authority.

There are a number of different plumbing specialties, including fire protection and irrigation. The former involves the installation of pipes that carry water to hydrants and other fire fighting equipment. The latter deals with the installation of piping that delivers water to landscaping and other outdoor areas.

It is important for plumbing systems to be well-maintained and properly installed. Failure to do so can result in expensive repairs and replacements. Regular inspections by professional plumbers can identify and prevent issues before they become serious problems.

Before beginning any plumbing work, the plumber will lay down plastic sheeting to protect the floor and other surfaces from dirt and debris. Then, he or she will open up the walls where necessary to run new piping. This phase is called rough plumbing and occurs before the concrete foundation is poured. The plumber will install what are called sewer accommodation stubs, which connect the home to the main sewer line. The plumber will also install sinks, toilets, and other appliances.

When installing a new plumbing system, the plumber must adhere to strict standards to ensure that the water is safe for consumption and that the drainage system works correctly. This includes ensuring that all parts are of high quality and that the connections are sealed tightly. The plumber may also have to install water meters to monitor water usage.

Plumbing is a complex system that requires the expertise of a professional. Trying to do it yourself can lead to disastrous results. A professional plumber will have the knowledge and tools to get the job done right the first time. Plus, they can help you avoid costly mistakes that could damage your home or worsen your health.

What Is the Job of a Plumber?

Plumber

Plumber installs and repairs water, gas, and drainage systems in homes and businesses. They also maintain fixtures and appliances that are associated with these systems.Plumber

Most plumbers learn their trade through apprenticeship. Apprenticeships are usually four years long and include a combination of on-the-job training and classroom learning. The qualifications required for an apprenticeship vary by province and territory.

Plumbers install, repair, and maintain water, gas, and sewage systems. They also inspect pipes and fixtures to ensure they operate correctly. They may work in factories, offices, homes, and other places with pipes and water systems. They also work on new construction, mines, home remodels, and existing structures that may need repairs.

The job description of a plumber is detailed and requires technical knowledge. It includes reading blueprints and building specifications, interpreting electrical and mechanical drawings, understanding codes and regulations, and operating power tools. It also involves working in small spaces and climbing ladders to do overhead work.

Residential plumbers: As a residential plumber, you install, maintain and repair plumbing systems in your own home. You may also perform basic plumbing jobs, such as unblocking drains and installing toilets.

Sanitary plumber: As a sanitary plumber, you are responsible for clearing blockages in home sanitary systems. You also unblock sinks and bathtubs, repair blocked toilets and drains, and install water heating systems.

Commercial plumbers: As a commercial plumber, you provide services to schools, colleges, and businesses. Your duties include repairing and maintaining water tanks and pipe systems, removing waste from buildings, installing piping, and cleaning up after work is done.

Service and repair plumber: As a service and repair plumber, you install and maintain water and gas systems in both residential and commercial settings. Your responsibilities are similar to those of residential plumbers, but you have more advanced skills and knowledge about specific issues that arise in larger commercial buildings.

Journeyman plumber: A journeyman plumber is a highly skilled worker who works with water, gas, and sewage systems. Their job responsibilities include directing workers engaged in pipe cutting and preassembly, installing underground storm, sanitary and water piping, and extending piping to connect fixtures and plumbing to these systems.

You use hand and power tools common to the plumbing trade, and you are able to work in a variety of conditions. You also have to be flexible to deal with changing work demands. If you are hired to handle a house call at night, for example, you need to be able to get there quickly and solve the problem.

Plumbers work in the building industry, installing and repairing pipes that carry water or gases into and out of homes, offices, schools, and other buildings. Their duties require knowledge of plumbing codes and techniques, as well as the ability to use tools like welding torches.

There are several ways to get trained as a plumber, including through technical-school programs or apprenticeships. Most apprentices are paid as they train, and their employers cover their education costs. These apprenticeships often last four to five years, and they can be found through local trade schools, businesses, and union chapters.

A formal plumbing program offers classroom training in a variety of subjects, including OSHA safety, blueprint reading and drafting, piping methods, mathematics, and plumbing tools. It also includes practical experience, which is necessary for becoming a licensed plumber.

Upon completion of the coursework, you may have to pass an exam in order to receive your certification. You can then apply for licensing in your state. Depending on the state, you may be able to obtain a journeyman plumber license after spending two to 10 years working under a master plumber.

You can also obtain a master plumber license after earning a bachelor’s degree in plumbing or another related field from a technical institute, community college, or vocational school. This will help you become more marketable to potential employers.

Many states require plumbers to obtain a license before working independently, and you can find out what the requirements are for licensure by checking your state’s licensing board website. You’ll need to meet a number of criteria, including being at least 18 years old, having a high school diploma or GED certificate, and completing an apprenticeship.

Once you’ve received your license, you can continue to develop your skills by taking courses in plumbing code, new technology, and other aspects of the trade. Some cities and counties also require continuing education for licensed plumbers, which can be a great way to keep your knowledge fresh and up-to-date.

Getting a master plumber license can be a challenge, but it is well worth the effort. This title is considered to be the highest in the profession and provides you with a higher salary, better benefits, and more opportunities for advancement.

Plumbers install, maintain and repair sanitation units, water and gas supply lines, heating systems, and associated fixtures and appliances in residential, commercial, and industrial buildings. They also perform diagnostics and ensure plumbing systems are in compliance with regulatory codes.

A license is required to work as a plumber in most states. In some jurisdictions, you can work as a plumber without a license, but it is highly recommended that you obtain one. It allows you to legally do business and earn a living, as well as helps prevent you from being ripped off by unscrupulous contractors.

If you plan to start your career as a plumber, you should begin by completing an apprenticeship program. This is the most efficient way to get the experience and skills you need. It requires you to work under the supervision of a master plumber.

The apprenticeship process usually lasts four years and consists of training in all aspects of plumbing, including the use of materials and construction. It is also an excellent way to gain the experience and knowledge needed to apply for a license.

A certification is a great way to promote your qualifications and to ensure that potential employers know you are a skilled professional. It can also help you to find jobs and increase your earnings.

In addition to the certification, you must also have a minimum of three years of work experience under a master plumber before you can apply for your journeyman license. This experience can be obtained by completing a plumbing apprenticeship or completing an approved college degree in a relevant trade.

You must submit a copy of your journeyman certificate, a letter from your employer stating that you have worked under a master plumber, and a certified record of your Social Security earnings. These documents should be submitted with your application and will be verified by the board before you can get a license.

Plumbers earn a good salary, but their wages vary widely depending on the city and state where they work. In some areas, a plumber’s pay is well below the national average, and in others, it can be quite high.

The wage of a plumber depends on several factors, including the type of work they do and their experience level. For example, entry-level plumbers earn less than electricians or HVAC technicians, while master plumbers earn more than journeyman plumbers.

Many plumbers find it challenging to make ends meet. This is because the job involves long hours and a lot of traveling, so a plumber must make sure that they can support themselves and their families while working.

There are a number of ways to increase your income as a plumber, however. Some of these include getting certifications that are relevant to your field and taking additional training courses. These can help you increase your skills and show employers that you are qualified for the job.

Other things that can increase your salary as a plumber include getting a promotion or starting your own business. These are both difficult tasks to accomplish, but if you’re willing to put in the time and effort, they can pay off in the end.

In addition, some companies offer goal-based bonuses to employees who complete specific goals. These bonuses are often paid out quarterly or annually and can help you increase your income.